![]()
Search Wild Foods Home Garden & Nature's Restaurant Websites:
Maple Syrup At Home - A How-To Picture Article
By: David Mills
Part 1 - Getting the Sap.
I've been doing this for more than 25 years now, and feel this can be a very easy project.
You can use most Maple tree types, see the Maples Page for more information on what type of Maple trees you can use and which ones you cannot. My favorite is actually the Silver Maple (Acer saccharinum), so that is what type of Maple I'm using in this article.
This article is for the home production of a small amount of Maple Syrup. The techniques shown here are not appropriate for processing large amounts of sap. The cost to do this method for small amounts of syrup is very low, and the supplies you purchase can be used for years.
For Part 2, go to: Processing the Maple Sap
Supplies For Outside:
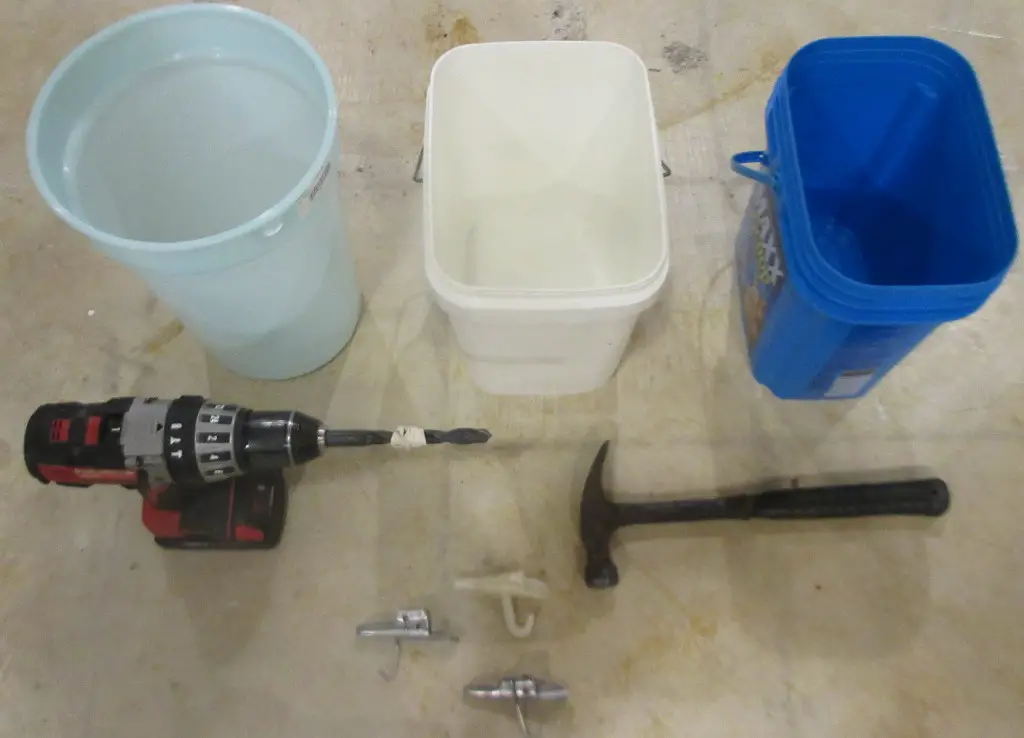
This is all you need for getting the sap. Sap Spouts, buckets, drill & hammer. For a small batch of syrup, you don't need many buckets or spouts. I used to have about 10 sets, now I just use three. I was getting way more sap than I could process with 10 sets. Even one spout and bucket on 1 tree is enough in many cases. It all depends on how much time/effort you are willing to put into this, and how much syrup you want. If you have never done it before, try no more than 3 sets and see how it goes. Just a note on buckets: as long as they are clean and have a handle, you can get away with not purchasing specialized pails like the round one here. I've even used pails without handles and drilled 2 small holes in the sides and put a strong string or thin rope through with knots to use as a handle. That all said, proper buckets are cheap, and you can get a lid to match them.
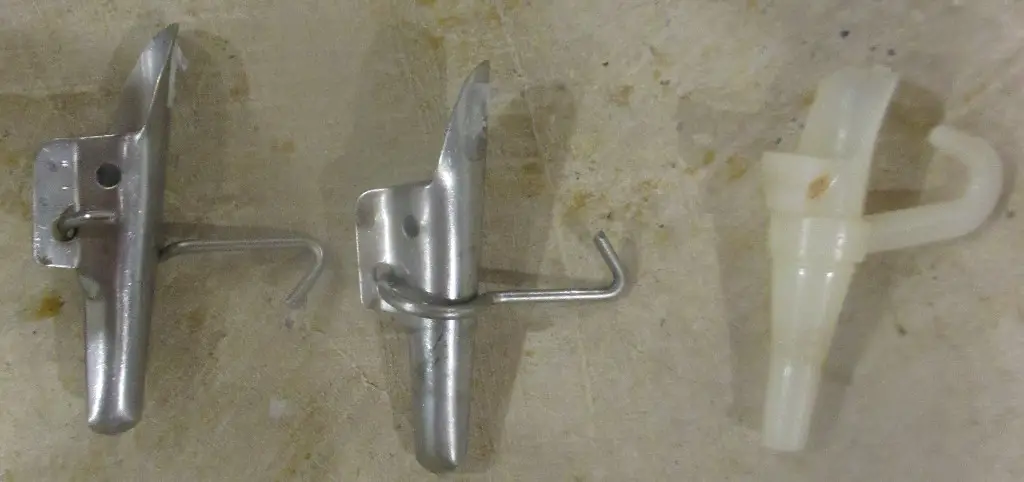
The spouts that are put into the tree come in many styles. The kind I find most often now have smaller ends that go into the tree called "Tree Savers". These allow you to drill a smaller hole in the tree. The size of hole can be different for different spouts, so follow the instructions that come with the spouts. The metal ones here require a 1/2 inch hole, the nylon one 7/16, and the tree saver types I have seen locally require a 5/16 hole.
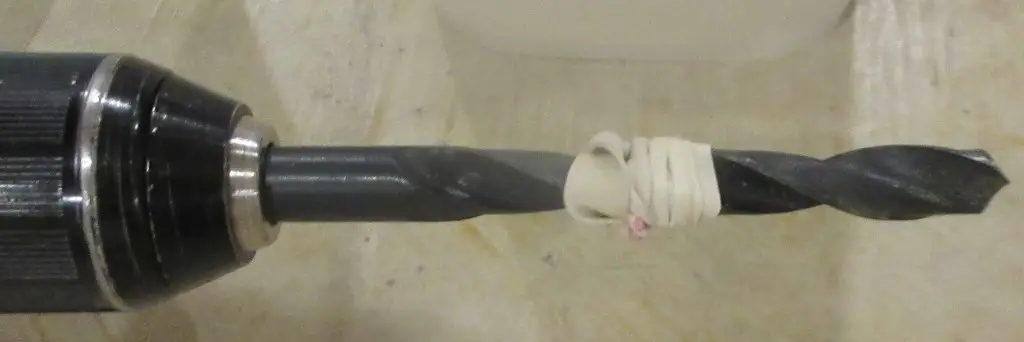
Follow the instructions that come with the spout for how deep to drill into the tree. With my older metal ones you see in the previous picture, the hole depth I have been using is between 1 3/4 & 2 inches. I measure the 2 inches from the tip, and wrap an elastic band around the bit on the drill so I know to not go deeper. I try to get the band close to the bark, but not touching when drilling.
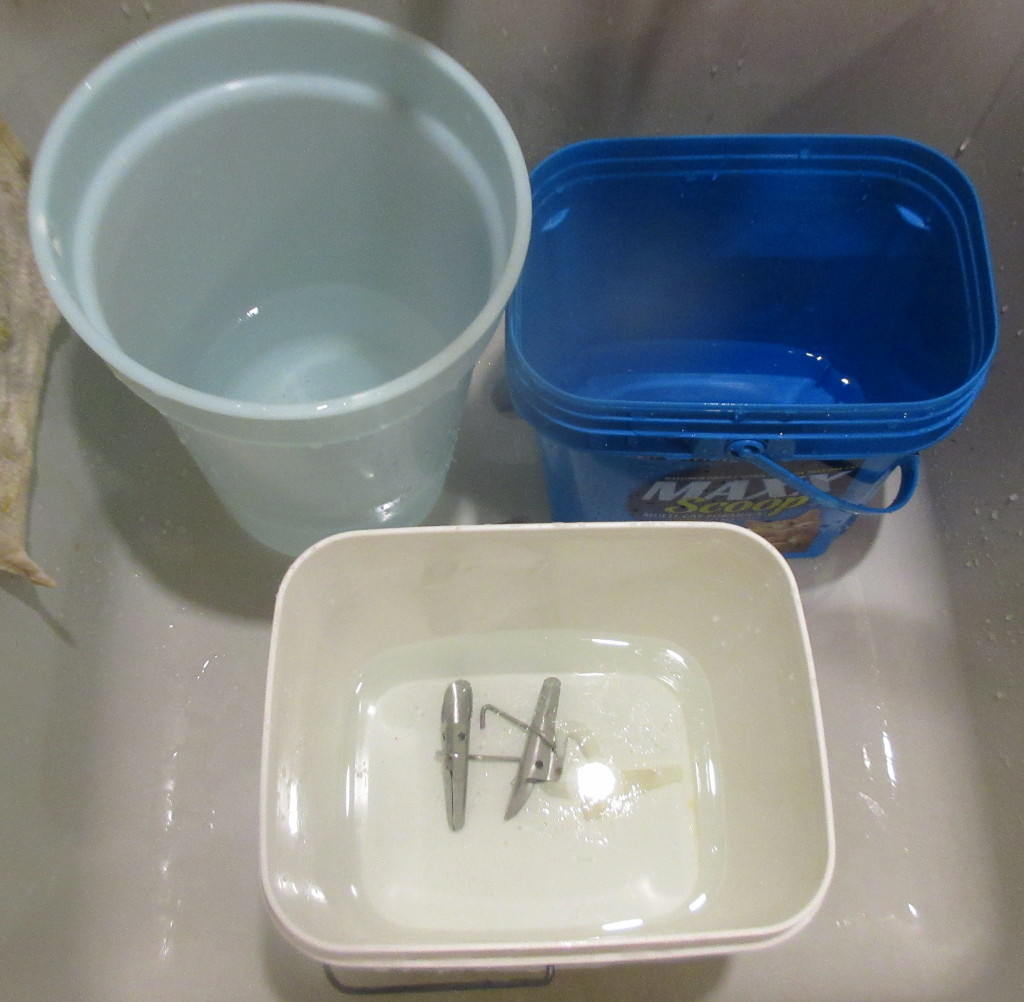
The pails have to be very clean and never used for anything toxic of course. Use a 10% bleach solution to sterilize the pails and spouts after cleaning them with soap and water, then rinse very well. Just as a side note, I have found the buckets that kitty litter comes in work fine - what comes in them is just dry clay, so as long as nothing toxic has gone into them and they are washed and sterilized, they do the trick very well.

Don't forget to sterilize the drill bit as well. Dipping it in the bleach solution, then rinsing is what I have always done and have not yet had a tap hole get infected.
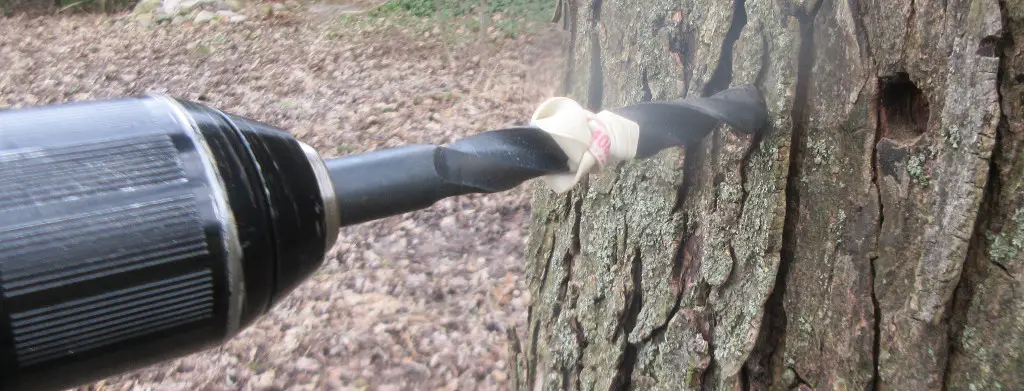
When drilling the hole, choose a spot on the SOUTH side of the tree - it does make a difference - you get more sap on the side heated up by the sun. You can use the other sides, but don't expect as much in my experience. Notice in this picture, just to the right of where the drill tip is touching the tree, there is last year's drill hole. Do not drill above or below a previous year's hole - it won't flow. When drilling, drill fairly level, but with a very slight angle so the hole is sloping down a touch - so that means the tip of the drill bit should be a tad bit higher than the end of the drill bit that goes into the drill. This helps prevent the sap from running back on the underside of the spout and down the tree instead of dripping into the pail.
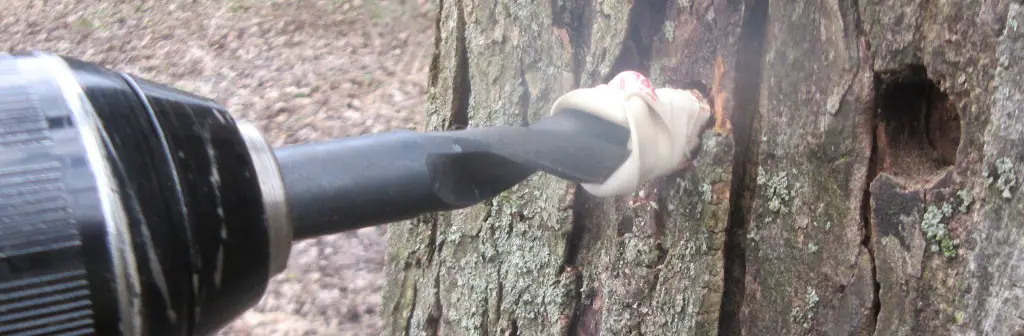
Stop just before the rubber band touches the tree, and this way you know you got the right depth hole.

Using your hammer, tap in the spout - make sure you get it the right way up with the trough on the spout down! Tap it in so it is snug, but don't mash it in. It should be in tight enough to seal and not leak sap and not pull out when the weight of a full pail is hanging on it. Within a few seconds of tapping this one it, it began to run sap - a very good sign.

Hang up the pails. Notice I don't use lids. You can buy them with proper buckets, and I have had them in the past. I have just found they were not needed and did not stop bugs from getting in the sap, but there is no downside in using them. Empty the pails at least once per day, I prefer twice. Sometimes, you have to empty them even more often. This Silver Maple can fill a pail 3 times per day on some days.
Part 2: Processing the Maple Sap
Share:


![]()
Wild Foods Home Garden Logo Copyright © 2017 David G. Mills.
Text Copyright © 2014, 2015, 2016, 2017, 2018 David G. Mills.
All Photographs Copyright © 2014, 2015, 2016, 2017, 2018 David G. Mills except where noted.*
All Drawings Copyright © 2014, 2015, 2016, 2017, 2018 David G. Mills except where noted.
All Rights Reserved.
This may not be reproduced in any form, in whole or in part, without written permission from the author.